Binders are a useful way to organize the Review process by group documents into different Binders and Sub-binders.
Note: Putting documents in a Binder does not copy them or move them in any way; it just helps to organize them.
Best Practice: A good use for Binders is to group of documents in a Binder which were located through a complex search to avoid having to perform the same search multiple times.
To create a Binder:
At the filter tree, right-click on Binders and select New Binder:

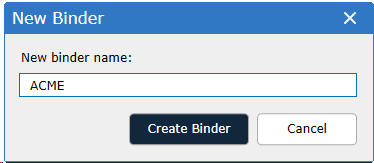
Type a name for the Binder and click Create Binder:
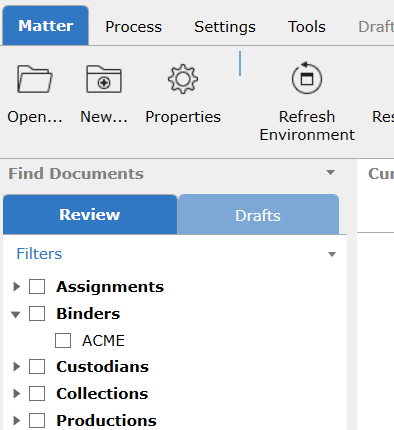
The new Binder will now appear in the filter tree:
To create a Sub-binder:
Create a new Binder according to the procedure above.
Right-click the parent Binder and, clicking New Binder from the menu that appears, type the name and click Create Binder.
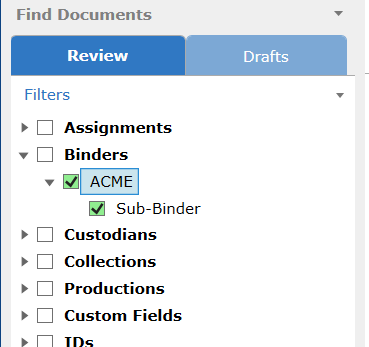
The Sub-binder now appears beneath that Binder name.
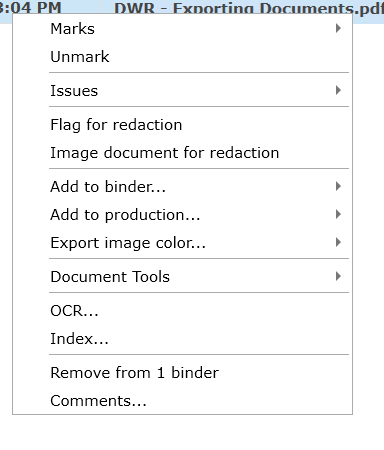
To add documents to a Binder or Sub-binder, use one of the following methods:
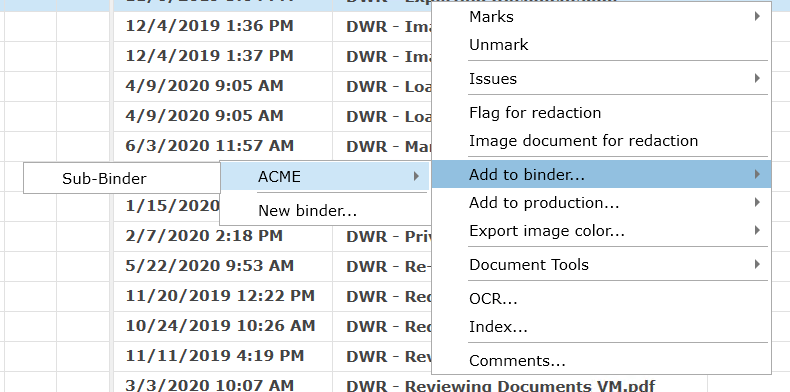
In the Current Docs grid screen, right-click, and select Add to Binder. When prompted, click the name of the appropriate Binder or Sub-binder:
To Remove documents from a Binder or Sub-binder:
Select the binder or Sub-binder and run a search for the results to populate in the Current Docs Grid Screen.
Select the document row(s) you want to remove from the Binder or Sub-binder
Right-click on the selected row(s) and select remove from Binder.
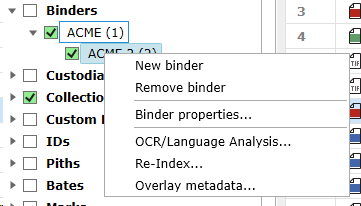
To remove a Binder or Sub-Binder:
Right-click the Binder name and click Remove Binder from the menu that appears.
Note: A Binder cannot be removed unless its Sub-binder(s) are already removed.
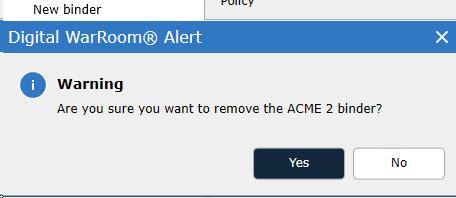
Click Yes.
The Binder name disappears but the document(s) from the Binder remain in the Matter.
To add comments and/or prevent changes to a Binder or Sub-binder:
Right-click the Binder name and click Binder Properties…
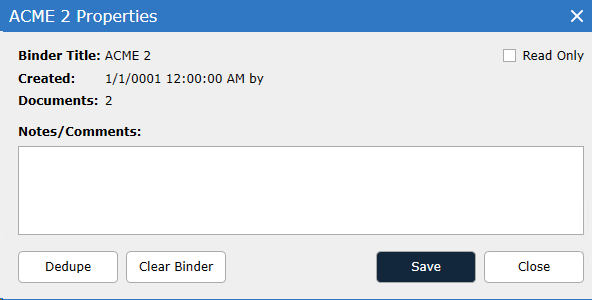
The Binder Properties window contains a free-text field (Notes/Comments) where notes and comments can be recorded about the binder. If the binder contains the results of a keyword search, the field could be used to list the keywords, or a description of the process that led to the results.
Check the Read Only check box and close the dialog box. The icon next to the Binder now has a lock icon added to it. Uncheck the Read Only box at any point to undo the action.
To dedupe a Binder or Sub-binder:
Right-click the Binder and click Binder Properties.
Click the Dedupe button. If any documents in the Binder share the same pith number (i.e. duplicate content), all copies but one are removed from the Binder.
Note: "Deduping" a Binder or Sub-binder is a way of removing duplicate copies of documents for the convenience of reviewers. Review automatically propagates document decisions (Marks, Issue Codes, or Comments) to any other duplicate documents in the database (except as noted above), so no information is lost when dedupe is applied.