There are three components for creating and accessing a Matter. It is important to understand and specify the location of each component.
1.The User Interface or end-user machine. This is where the log-in icon is located. It is also the local user's desktop.
2.The document repository - the location where preserved documents are stored. For large Matters this is often a server or network storage device containing many terabytes of disk space. In some companies and firms the network storage device may be referred to by a simple name or a drive letter (ie. X:)
3.The Matter database or work product repository. Each Matter has a database that collects user input and directs traffic between the user interface and the document repository. The Matter database could be on the same machine as the User Interface and/or the document repository. The location of the Matter database must be defined by the operating system and not by a simple name.
Recommended for Single-User DWR Pro environment - The User Interface, document repository and the Matter database should all be on the same machine.
Recommended for the Multi-User DWR Pro environment - The document repository and database are best set up on the same machine with end users using RDP to access the database and document repository.
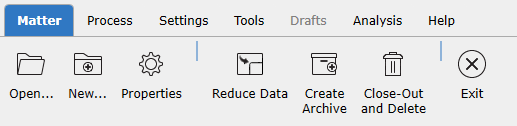
From the Matter menu click New:
The Create New Matter dialog box appears:
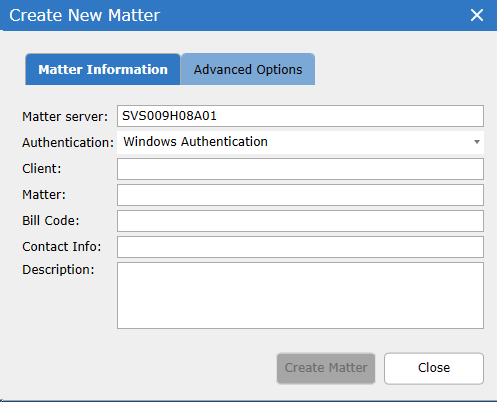
When a new Matter is created several settings and configurations must be designated.
1.Ensure SQL is Setup
Hosted users should already have SQL installed in their environment – move on to step 2.
For Digital WarRoom Pro users, first install SQL onto the local machine. The install link is included on our DWR Pro Onboarding Page. The defaults options are successful in most environments, however there are a couple points to keep in mind outlined in our video tutorial: SQL Server Download and Installation Instructions.
Most importantly, when given the opportunity to set a SQL instance name we highly recommend to take the default, as outlined in the video. The default instance name should be "MSSQLSERVER".
2.Matter Server Field
In the Matter Server field, type the matter server name. What you type here will depend on the instance name you entered when SQL was configured.
•If you took the defaults, as recommended in the SQL install video, enter your Machine Name. You can reference your machine name by simply typing "." or "localhost".
•If you set a custom instance name during SQL installation, type the instance name here.
3.Windows Authentication Field
In the authentication field, click either Windows Authentication or SQL Server Authentication. Default value is Windows Authentication.
•Windows Authentication: This option should be picked in almost all scenarios. For Pro users. Windows authentication will work correctly assuming you clicked the "Add Current User" button during SQL installation.
•SQL Server Authentication: This option is for more advanced users that have set up a custom SQL account
| 4. | In the Client and Matter fields, type the associated Client and Matter name. These fields are metadata for your own use and will not affect Matter setup. Optionally, a Bill Code can be provided, Contact Info, and a Description of the Matter. This matter-level information is available for editing by going to Matter->Properties at any time in DWR. |
Manage document location
5. Specify either a network (UNC - Universal Naming Convention) or local path for the repository location. The default location is C:\DWR.
Important: If choosing a UNC path please ensure your system administrator has given access to the folder or repository.
Advanced Options:
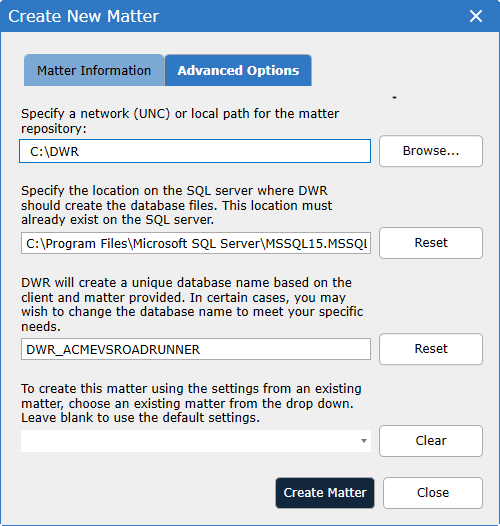
Manage work product database location
In Database Location specify a location for DWR to create the database files.
•The location must already exist on the SQL server.
•The database location cannot be set as a UNC path.
Important: The third box in Database Location allows users to automatically use settings from an existing Matter. Click on the drop down to choose an existing Matter that you want to use as a template for your settings. (This feature is used when a firm handles numerous cases that will have the same Marks and Issue codes. These settings will not need to be recreated for each new Matter but will be mirrored from the existing Matter in the New Matter.)