Sometimes your business workflow requires reviewing documents outside the Digital WarRoom environment. Digital WarRoom does not track changes outside of the system. There are a number of naming options provided to track the exported documents back into the database after making changes.
To export documents from the Document List:
1.Run a search to populate the Document List with the information you want to export. If you want to export a binder, you'll need to execute a search to load the binder first.
2.Optional - If you wish to only export a subset of the documents in the Document List, select the rows you wish to export. If nothing in the grid is selected, all documents in your search result set will be exported.
3.From the Tools menu, select Export Documents or type Ctrl-E.
4.Destination - Browse to a folder where you want DWR to put the exported documents using the ... button.
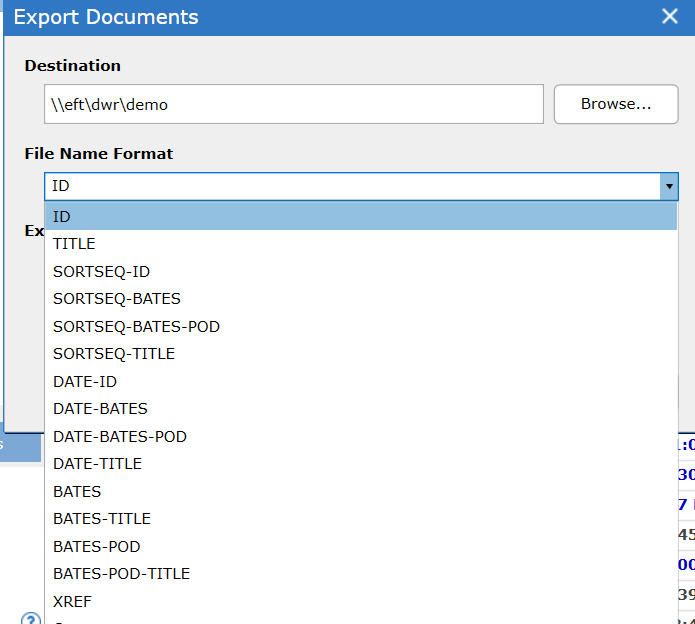
5.Filename Options - When exporting documents, it is highly encouraged to consider your naming convention so that documents can be cross referenced between your exported excel sheet and Digital WarRoom. The Filename Options tool allows you to format/construct a filename using the fields in three drop downs.
a.Document Sequencing: Select "Sorted Sequence #" in the left most drop down to pre-pend a sequence number to your document filenames that matches the current sort order of the document list. If you don't want a sequence number, leave that drop down blank.
b.Filename: Using the required middle drop down, name files with their original titles (TITLE), their DWR document IDs (ID), their Bates numbers (BATES), or their DWR control number (CONTROL#). If you choose the Bates or Control# options and the files you are exporting do not have Bates or Control Numbers, then DWR will default to the ID naming format.
c.POD: If you are saving produced documents and you wish to include the protective order designation (POD) in the exported file name, choose the POD option from the right-most drop down.
6.Export As - Choose the "flavor" of each document that you want to export
a.Natives - This will export the document format as it was originally processed into the DWR system (.msg, .doc, .xls, etc.)
b.Images (where exist, else Native) - This will export the TIF imaged versions of each document. If a document is not yet imaged, the Native version will be exported instead.
c.Images as PDF (where exists, else Native) - This will export PDFs of the imaged version of each document. If a document is not yet imaged, the Native version will be exported instead.
d.Emails as HTML (everything else Native) - This will export MSG/EML files in an HTML form that can be viewed using a web browser. All other files will be exported Natively.
Important: When exporting produced documents that were produced as type "Native", even if choosing one of the "Images" options, the native file will be exported instead of the placeholder image.
7.Include - Optionally include OCR/Extracted text where available and/or RTF formatted Slipsheets containing metadata about each exported file.
8.Click Export. DWR will open the export location for you automatically when the export completes.
9.Included with your document export will be a "manifest" index.html file containing all of the currently visible Document List columns as well as Bates numbers and hyperlinks to the exported documents.
Important: Make sure you hide any visible Document List columns that you don't want to show up in the manifest file prior to exporting the documents.